Mini Satellite-Antenna Rotator Mk2a
In the May 2016 edition of Amateur Radio magazine, we published this article describing the design and construction of a mini satellite-antenna rotator. It used some small DC motors and a novel combination of 3D magnetometers and accelerometers to provide absolute azimuth and elevation feedback. Note: This is a complex DIY project for the advanced kit constructor. Want a fully assembled, tested and calibrated unit? See SARCTRAC.
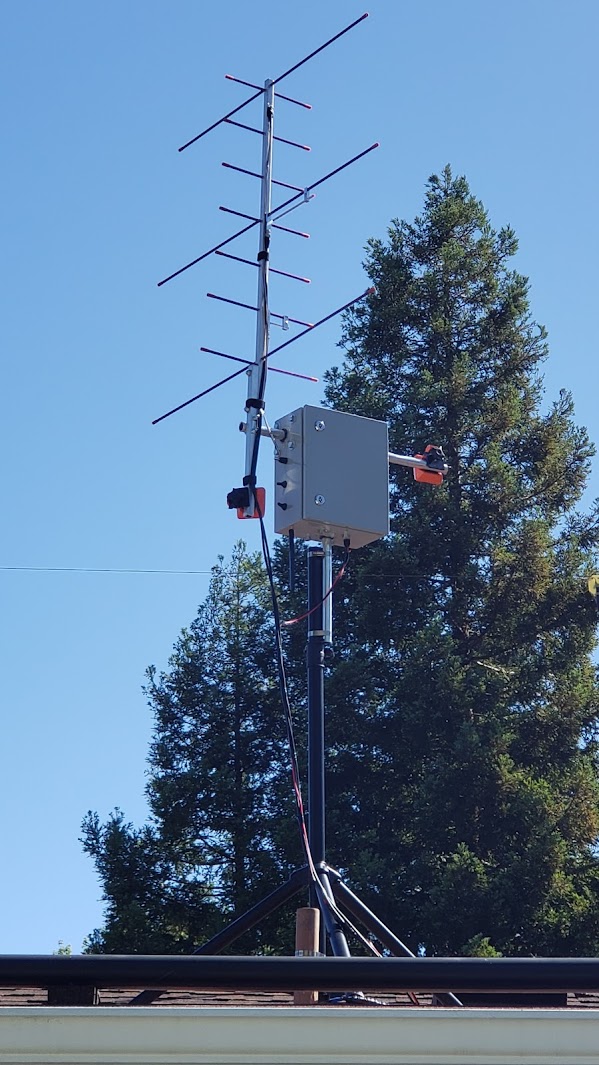
The original rotator was designed for quick set-up and portable operation at our primary school Amateur Radio clubs. It is very light-duty and can only be used with a small, dual-band, hand-held antenna. Some readers asked us if the rotator could be scaled up for a larger, permanent satellite antenna installation at home. Specifically, one which could handle two, much longer, cross-polarised Yagis, for 2m and 70cm, mounted on either side of the rotator.
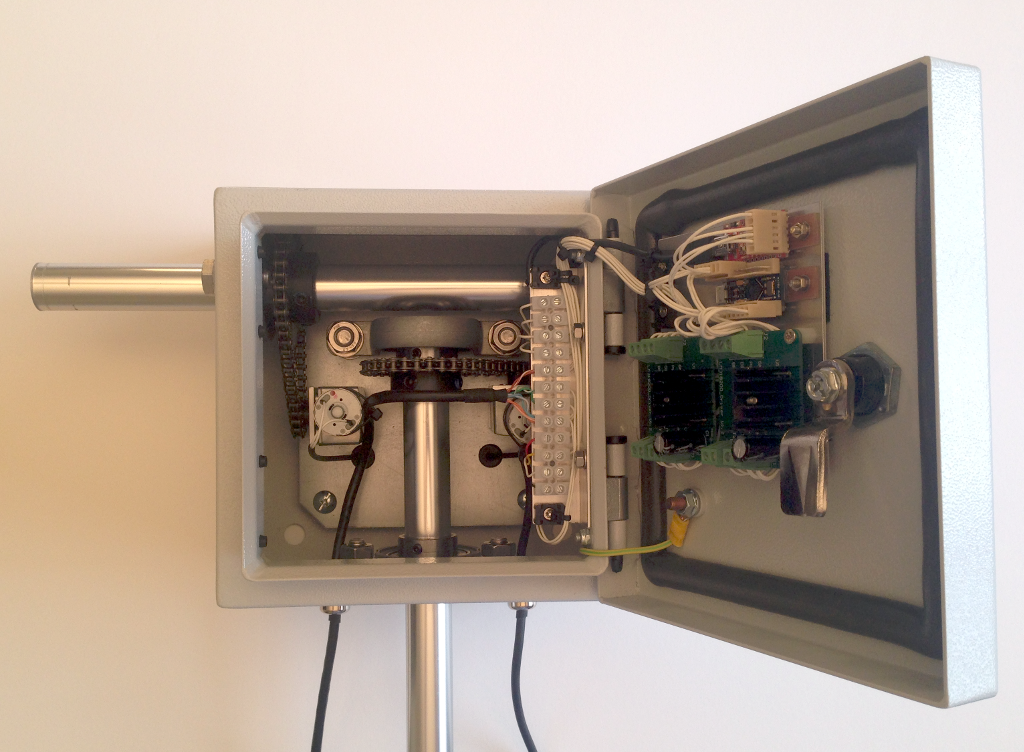
This article published in the October 2017 edition of Amateur Radio magazine describes the mechanical design and construction of our Mini Satellite-Antenna Rotator Mk2a. This version is controlled in the same way and uses the same software, set-to-work and calibration as the Mk1 Version.
The full construction details published in a PDF document can be found here. For a version using pulleys and timing belts instead of sprockets and roller-chain see the Mini Satellite-Antenna Rotator Mk2b below. Get the latest Arduino Software for our Mk1 and Mk2 Mini Satellite-Antenna Rotators.
Mini Satellite-Antenna Rotator Mk2a
Important: Some readers have reported that Globalindustrial no longer stock the Tritan roller-chain and sprockets. Please try searching on www.ebay.com for the following parts: “25-1R X 10FT”, “25-1R CL”, “25BS10H X 1/4” and “25BS32H X 1”. They appear to be available from a seller called Globalpower. Unfortunately on-going supply of parts for our projects is outside of our control.
Important: We no longer recommend building the RS-485 long-haul serial link. Some readers have reported that it is very susceptible to RF and Voltage Spikes, which may destroy the RS-485 drivers. We have tried USB over CAT5 cable extenders also. They are prone to errors. We also no longer recommend using a pair of APC220 Radio Communications Modules, as these are half-duplex and do not work with the debug, calibration, monitor and demonstration commands of the Mini Satellite-Antenna Rotator software which provide continuous data output. In fact, the only reliable wireless solution that we have found is to use our SARCTRAC Mk3 kit, which provides a high speed, reliable, WiFi connection. It will all save you the trouble of building and programming the controller and calibrating the sensor. You would use it with the same motors and the red, L298N, motor driver board inside the MSAR Mk2 cabinet. More details will be announced soon.
Mini Satellite-Antenna Rotator Mk2b
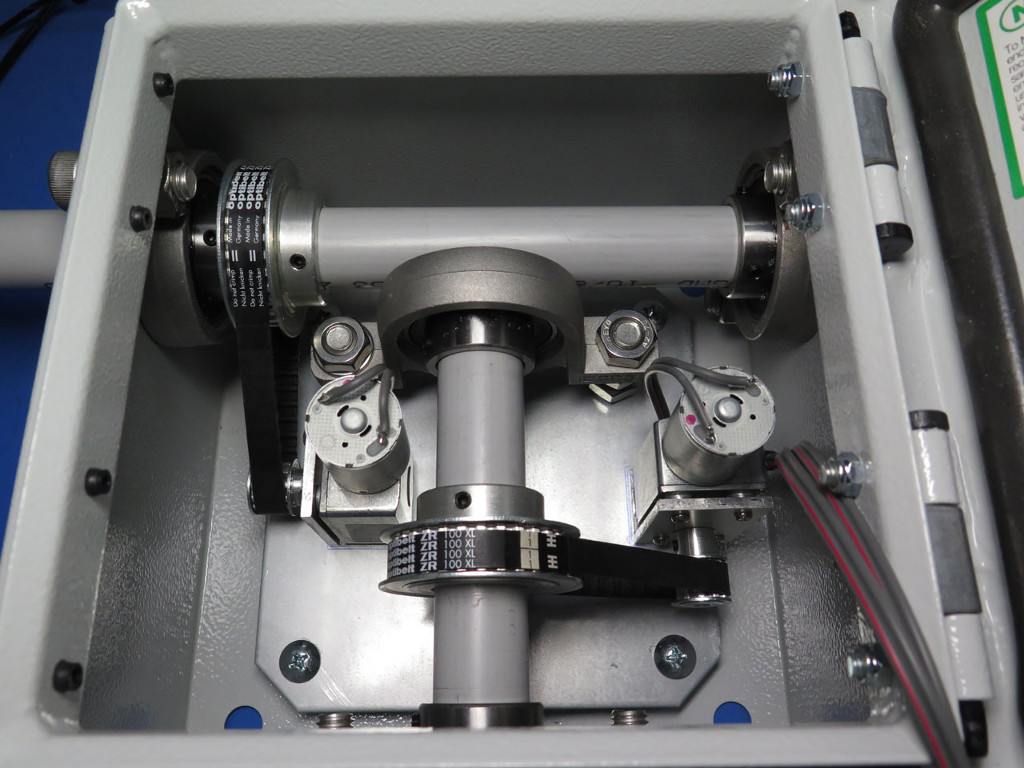
And now for a real surprise! Mark, Technical Director of MiniKits, has come up with a brilliant solution for those, like us who don't live in the US, and who are finding it hard to source the sprockets and roller-chain. Mark has found a very cheap source of 25mm and 6mm bore pulleys and timing belts on eBay. The assembly is shown below. Mark is using 25mm PVC tubing for the shafts just to test the set up. It looks like a fine idea and should be strong enough to handle a pair of counter-balanced, 3m long, yagis.
For the time being, there is no assembly drawing of the Mini Satellite-Antenna Rotator Mk2b. The position of the motor mounting will change at the very least. We won't know until we order some pulleys and give it a try. Thanks again Mark for a terrific idea!
Mini Satellite-Antenna Rotator Mk2b Parts List:
- 2 x Pulley XL10T 6mm bore (A$2.96 each)
- 2 x Pulley XL30T 25mm bore (A$9.39 each)
- 2 x Timing Belt 100XL, 254mm perimeter, 50 teeth, 9.53mm wide 5.08mm pitch (A$1.55 each)
Tip: Search on eBay for the above parts, but be very carefull checking the type and bore size.
Mini Satellite-Antenna Rotator Mk2b
Status Reported by Builders
The following is a list of some of the builders who have completed the rotator and sent us their comments or pictures:
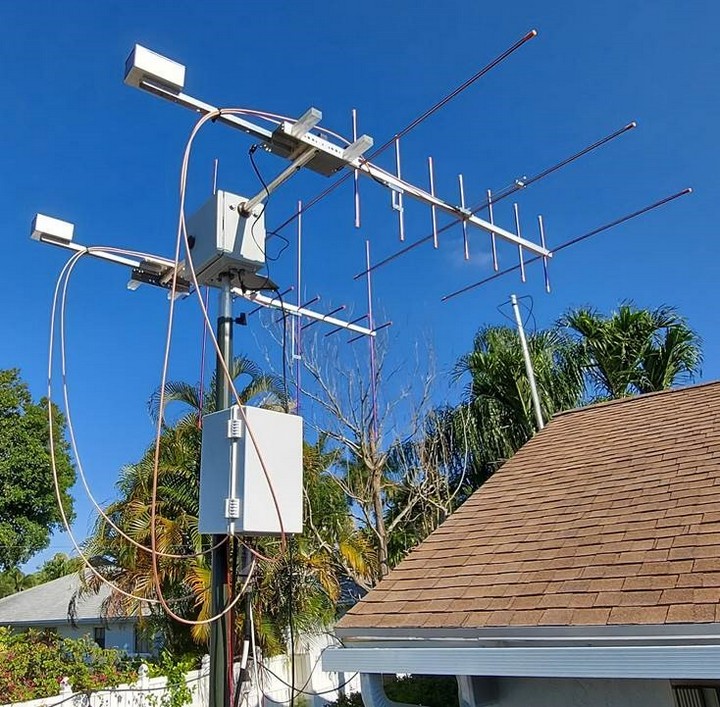
Tim N4IFP - "I built the SARCNET MK II Rotator about a year and half ago and just wanted to contract you and mention how pleased and happy I am with the system. I really enjoy working many different satellites, including the amateur and weather satellites. I have documented a lot of this activity on my QRZ.com page. Just recently I added a second Arrow antenna to the rotator to provide vertical and horizontal polarization with a remote switch box. Here is a picture of the dual Arrow setup:

I started with Gpredict as the control SW and recently switched to SatPc32 as the control SW for both the CAT of the radio (an IC-9700) and control of the SARCNET rotator. I have enclosed info on what I did to make SatPC32 work with the rotator, if any of your other users would be interested. Below is a picture of the rotator setup in SatPC32 and the key is to use SAEBRTrackBox as the desired rotator because it uses the Easycomm protocol:
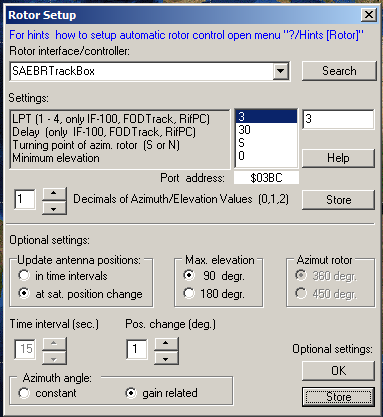
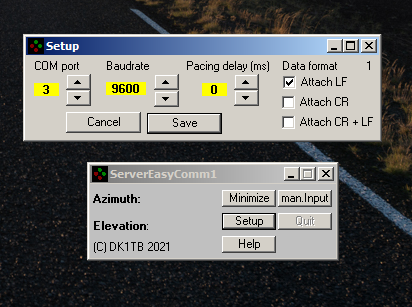
I found that SatPC32, with this rotator selected, was sending both a Linefeed and Carriage Return (I could not select LF only) for the Easycomm commands. However, the Arduino interpreted this as a local test command, because of the CR. Following your comments about SatPC32 not implementing EasyComm II properly I decided to contact Erich Eichmann DK1TB, the author, and ask him if he could modify the EasyComm Server and add a selection for Linefeed only. He responded immediately and modified the .exe file for the server. It looks like this now:
Anyway, I just wanted to thank you for a very cool and wonderful project!!! As you can see I have pushed it to the max for my setup (Dual Arrows and IC-9700). I have made many, many contacts on SO-50, AO-27, AO-91, RS-44, and ISS. Regards, Tim N4IFP."
Thierry F4EWI - Sent us this picture of his project, which uses the timing belt version:
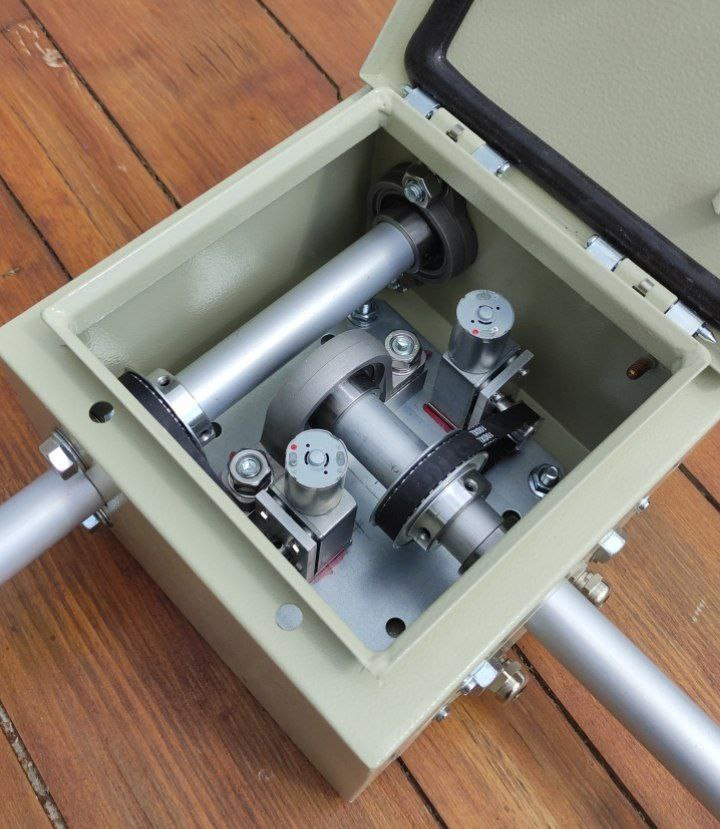
Ryan Herbst - "I appreciate you sending me this code last year. I have attached a photo of my home built rotator which uses this code."