
Raspberry Pi Pico
This workshop presents the setup, coding and debugging of the Raspberry Pi Pico Microcontroller.
This page is under development.
Setup
The Raspberry Pi Pico can be set up to run C/C++ or MicroPython programs. You can select the language you prefer. Here, we use the Arduino Integrated Development Environment (IDE) for C/C++ and Thonny for MicroPython. You can also choose which operating system you prefer to run on your development machine. Here, we use Windows 10 or Raspberry Pi OS (Linux).
Note: The Arduino IDE provides the advantages of using the same IDE as for your Arduino devices and it includes access to many useful C/C++ library routines (many of which, but not all, will run on the Pico).
When you first plug a Raspberry Pi Pico into the USB port of a Windows 10 machine, it will mount the device as an external File Store and open up a File Explorer window for a device called "RPI-RP2 (D:)". If the window does not open, unplug the Pico, press and hold the BOOTSEL button and plug it back in. You can actually program the Pico by dragging and dropping executable .uf2 files onto this window.
C/C++ on Windows 10
To program the Pico using C/C++ with the Arduino IDE please use the following procedure:
- Plug the Raspberry Pi Pico into a USB port
- Download and install the Arduino IDE from: https://www.arduino.cc/en/software
- Open the Arduino IDE
- Click the Boards Manager icon
- Enter "Pico" into the Search Box
- Select "Arduino Mbed OS RP2040 Boards"
- Press "Install"
- Select File | Examples | 01.Basics | Blink
- Select Tools | Board | Arduino Mbed OS RP2040 Boards | Raspberry Pi Pico
- Note: Do not select a Port, as for first-time usage Windows 10 will not have registered a COM port yet
- Press "Upload". The Arduino IDE will compile and try to upload the Blink sketch, which will fail for the above reason.
- Windows 10 will then report:
- Settings: Setting up a device - We're setting up 'Raspberry Pi Pico'.
- Settings: Device is ready - 'Raspberry Pi Pico' is set up and ready to go.
- The Arduino IDE will then display a COM port for the Pico. Tools | Port should now display: COMx (Raspberry Pi Pico)
- Press "Upload" again. The LED on the Pico should start flashing slowly. The Arduino IDE Output window will display:
Sketch uses 89829 bytes (4%) of program storage space. Maximum is 2097152 bytes.
Global variables use 42824 bytes (15%) of dynamic memory, leaving 227512 bytes for local variables. Maximum is 270336 bytes.
Congratulations, you have now configured the Arduino IDE to compile and upload C/C++ programs the Raspberry Pi Pico!
MicroPython on Windows 10
To program the Pico using MicroPython with the Thonny IDE please use the following procedure:
- Download the latest UF2 bootloader from https://micropython.org/download/rp2-pico/
- Press and hold the Raspberry Pi Pico BOOTSEL button.
- Plug the Pico into a USB port.
- A File Explorer window for a device called "RPI-RP2" will open
- Drag and drop the UF2 bootloader (e.g. rp2-pico-20220618-v1.19.1.uf2) to the RPI-RP2 folder.
- The File Explorer window will close.
- Browse to https://thonny.org/
- At the top of the page, in the download box, click on your operating system, select your platform and download the latest installer for Thonny.
- Run the installer, as Administrator (right-click to select)
- Select the install mode: "Install only for me". Select Next. Accept the agreement. Select the installation folder. Select "Create a desktop icon". Press Finish.
- Double-Click on the desktop icon. Select the language and standard settings.
- When the Thonny window opens select Run | Configure interpretter...
- Select the "MicroPython (Raspberry Pi Pico)" interpretter and click OK
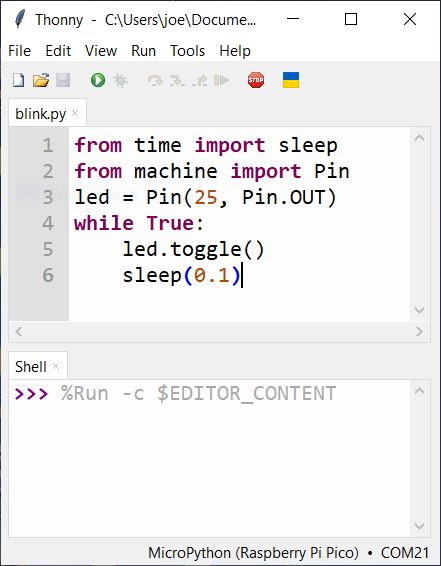
- Enter the code below. It should look the same as the image below.
- Select File | Save as... | This Computer | blink.py.
- Click the green Run button.
- The built-in LED on the Pico should flash.
- To save the program to the Pico: Select File | Save as... | Raspberry Pi Pico | main.py.
- The program will run whenever the Pico is started.
Code:
from time import sleepfrom machine import Pinled = Pin(25, Pin.OUT)while True:led.toggle()sleep(0.1)
C/C++ on Raspberry Pi OS (Linux)
MicroPython on Raspberry Pi OS (Linux)
Coding
Debugging
Something went wrong? Here are some problems we have encountered and how to fix them.
Windows 10 COM Port Not Registering
When you plug a Pico into a Windows 10 USB port it is supposed to register a virtual COM port. The COM port should appear in the Ports section of Windows Device Manager. Sometimes Windows 10 just refuses to register a port or it registers a port that is already in use. Sometimes, an error in a previously uploaded Pico program can stop Windows 10 from registering the COM port. These problems can be permanent, until you perform the recovery action below. One known programming error that causes this to happen is initializing a Pico serial (UART) port in the constructor of a C++ class. There may be other causes too. To check for this problem and to restore operation, perform the following steps:
- Unplug the Pico from the USB port
- Open Windows 10 Device Manager and select Ports
- Select View | Show hidden devices
- Plug the Pico into the USB port
- Check to see if a new COM port appears in Windows Device Manager. If it does, all is well. If not, proceed with the following steps:
- Unplug the Pico from the USB port.
- Press and hold the Pico BOOTSEL button
- Plug the Pico into the USB port
- Release the pico BOOTSEL button
- Verify that the Pico file explorer window has opened
- Copy this pico.ino.uf2 file to the Pico file explorer
- Verify that the Pico file explorer window closes and a new COM port appears in Windows 10 Device Manager. If it does, all is well. If not, maybe try again?
- If, however, Windows 10 allocates the Pico to an existing COM port, that can cause problems too. You may be able to fool Windows 10 into using a differnet port by right-clicking on the Pico device and selecting "Uninstall Device". Or you can try uninstalling "hidden" devices to free up some COM ports. Then repeat steps 5 onwards.
- We have no idea why Windows 10 does this. One hopes it may be fixed in a future update.