
Amateur Radio Operation
This activity introduces the concept of radio operation and provides practice in it. Every radio is different. They have different controls, displays and indicators. Some, like an on-off switch or a volume control are common, but others depend on the type and special features of the radio. It is better to start learning about radio operation by choosing a simple type of radio first. This activity is just a first step and leads into the the more advanced activities of Amateur Radio HF Communications, Amateur Radio VHF/UHF Communications and Amateur Radio Repeater Communications.
Introduction
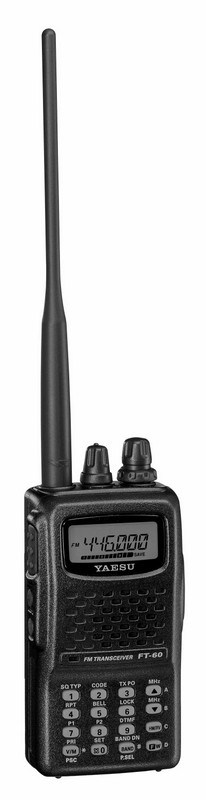
You probably won't want to hear this, but the most important part of Amateur Radio Operation is first reading the manual. Quite often that is the only difference between an expert radio operator and a beginner. Apart from just showing where all the controls, displays and indicators are, the radio manual provides important safety instructions and all sorts of useful hints and tricks to getting the most out of your Amateur Radio. While we are not going into that detail in this activity, we expect all students to get familiar with the concept of reading the manual first before operation. In this activity we have chosen a basic VHF/UHF FM Handheld radio, the Yaesu FT-60R.
Preparation
You will need:
- Possibly several radios of the same type if you want to have a QSO. Otherwise a working radio connected to an antenna and a particpating external station withing range.
- Choose radios that the students might buy as their first Amateur Radio. Avoid old, rare, unsafe, expensive, complex, high-power and home-brew radios. Kids won't be using them. A cheap, Chinese, hand-held radio would be a good choice.
- A large photocopy or projection of the radio manual diagram pointing out it's controls, displays and indicators.
- Radio accessories like a power supply, batteries, charger, microphone, speaker and cables etc.
- To check that the radio is working and that you know how to use it. i.e.: Read the manual.

Activity
- First outline the lesson:
- We will first get familiar with this type of radio, then we will each have a turn using it.
- Describe the type and use of radio you have, for example:
- There are base-station radios, for use on a table, mobile radios, for mounting in a car, but this one is a hand-held radio.
- It is very portable: You can take it anywhere. You can put it in your backpack or clip it to your belt while hiking.
- This is the type of radio used by professional Police, Fire and Ambulance personnel.
- It is bigger than a mobile phone, because it has more power.
- It works even in a natural disaster situation, when cell-phone towers are down and the network is jammed with hundreds of emergency calls.
- It has its own built-in antenna, speaker and microphone.
- You talk into the microphone and you listen to a speaker on the front of the radio.
- To talk, you have to press a button on the side. It is called a Press-To-Talk button.
- Only one station can talk at a time - all other stations have to listen.
- When you are finished talking, you just say "Over".
- The radio signals come out of the flexible antenna on the top. We call it a rubber-ducky antenna!
- OK. This is VERY IMPORTANT: Always keep the antenna well away from your head!
- Who can tell me what is very important? Good.
- This radio works on Very High Frequency and Ultra High Frequency Amateur Radio bands.
- You can use it to talk with another radio within Line-Of-Sight (say 2-5km around the city); or
- You can use it to talk with another radio within 100-200km via a mountain-top repeater; or
- You can hike up to a mountain top and talk with another radio directly or via a distant repeater; or
- You can use the keypad to talk to stations all around the world using a local repeater and the Internet; or
- You can attach an external antenna and talk to astronauts on the International Space Station or to other stations through Amateur Radio Satellites. You can't do that with a mobile phone!
- Demonstrate the radio operation:
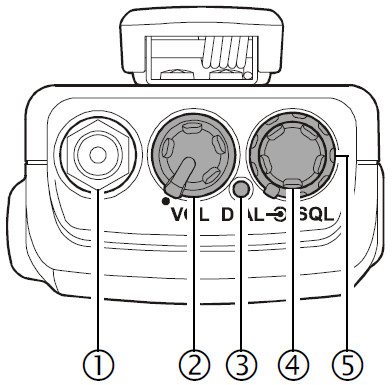
- Make sure the Antenna is connected (1).
- Turn on the radio and adjust the Volume Control (2).
- Select the Channel (4) to use: There are hundreds of channels. We will use channel "XYZ" today.
- Adjust the Squelch Control (5):
- Turn it left. You will hear noise in the speaker and see the the Green LED (3) goes on.
- Turn it right, just until the Green LED (3) and the noise goes off.
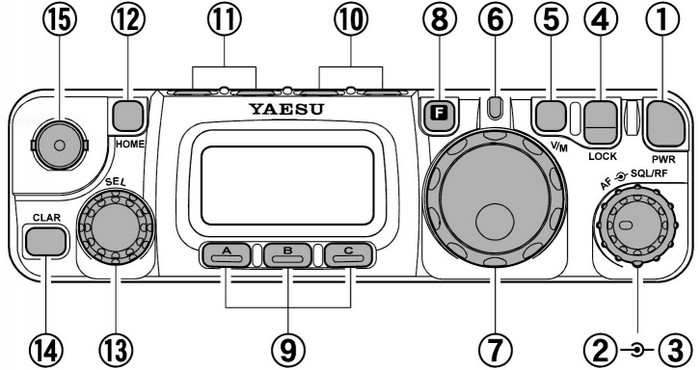
- Check that channel "XYZ" is shown in the Display (6).
- Listen to the Speaker (7) and talk into the microphone (8).
- Press the Press-To-Talk button on the right.
- Hold the radio about 20cm from your mouth and speak normally.
- REMEMBER: Do not hold the antenna near your head.
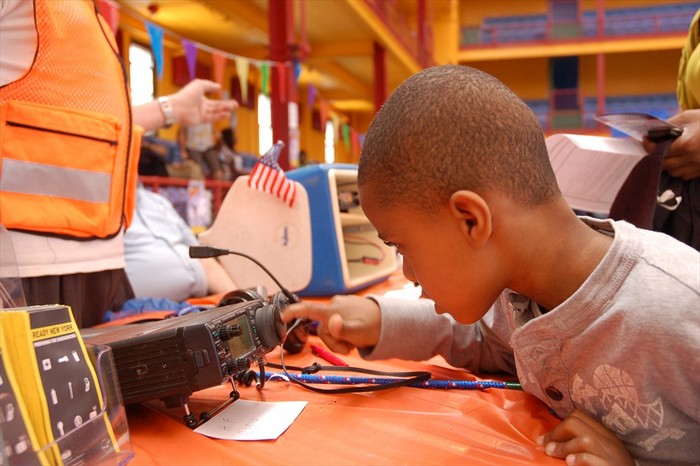
- Take it in turns to use the radio:
- Adjust the volume, channel and squelch
- Transmit using the PTT button. Use Amateur Radio Call Signs and Amateur Radio Operating Procedures, e.g.:
- "Is this frequency in use. This is VK3YSP. Over."
- "Nothing heard. VK3FOWL this is VK3YSP can you hear me Julie. Over?"
- "VK3YSP this is VK3FOWL roger Joe, I am receiving you readability 5, strength 9. Over."
- Now you can have a conversation.
- Next time: Review radio operations and safety, then take the radios (the more the better) out to the playground.
- Select low power and an unused channel.
- Lock the settings so they don't get changed.
- Attach a lanyard to each one, so that they don't get dropped.
- No running with the radios.
- You must supervise all transmissions and identify yourself and your activity on the frequency every 10 minutes.
- Everyone could use your callsign with a suffix e.g. -1, -2 etc. but it is better to have more operators present.
- Devise a role-play mission suitable for the playground.
- Never use PAN or MAYDAY over the air.
- Hand out achievement certificates to all participants. Update their QSO awards.
- Next time: Bring along a different radio. Try an HF portable radio, like a Yaesu FT-817 for example.
- Review the operation of the same controls, displays and indicators.
- Describe and demonstrate the new controls, displays and indicators.
- Everyone should have a turn tuning in a SSB signal.
Homework
- Find some pictures of Police, Fire and Ambulance personnel using hand-held radios.
- Hand-held radios are perfectly safe if you hold the antenna away from your head. Why?
- What would you use a hand-held Amateur Radio for?
- What would Amateur Radio operators do in the case of a natural disaster?
- What would you do if you were lost in the bush and no-one answered your hand-held radio call?